


Free Patchwork Sashiko Tote Bag Tutorial


This Patchwork Sashiko Tote Bag is something special! Easy to put together thanks to French seams, plus it has a nifty open pocket inside. If you haven't used French seams before, don't worry, it's just a fancy way of saying "we're going to sew the seam twice to hide the raw edges." It's a great way to use your favorite fabrics in a bag without needing to install a lining. Finished size is 10 1/2'' x 13'' with a 5'' x 5'' pocket.
The other reason this tutorial is special is that I'm going to tell you how to change the size of the tote bag using some simple math. If you like a larger tote to carry more things, it's easy to do! It's all at the end of this post, just scroll down or click here: Customize your Tote
Instructions for adding the Patchwork Sashiko embellishment on the front of the tote bag is not included in this tutorial...but you're in luck! It's all in my book, "Patchwork Sashiko: Transform Your Scraps" from C&T Publishing. Click to purchase either the print or PDF format.


Patchwork Sashiko Tote Bag Materials
Fabric marking pen/pencil: I use either a Frixion pen or a Clover Chaco Liner
Clear ruler (approximately 2-3'' wide x 18'' long)
Fabric Scissors or rotary cutter + mat for cutting fabric pieces
Patchwork Sashiko Tote Bag Fabric Requirements
Fabric scraps of your choosing: enough to cover an area approximately 16'' x 16''
Canvas or Linen/Cotton Blend fabric: 1/2 yard
Cutting Instructions
From the Tote Bag Body fabric:
Cut (1) 6'' x 12'' rectangle for the pocket
Cut (2) 3'' x 29 1/2'' rectangles for the handles
Cut (1) 12'' x 30'' rectangle for the body.
Note: I cut one 12'' strip from the WOF and cut a 6'' and 12'' length for the pocket and body respectively. Then, trim the remaining 6'' strip to 29 1/2'' and cut that into (2) 3'' strips for the handles.
Step 1: Make the Pocket
Fold and press one of the 6'' edges to the WS by 1/2'' twice. Top stitch at the top and bottom of the folded edge.


Fold Pocket piece WST and position the top stitched edge at 1'' below the raw edge. Pin the right and left Pocket edges and sew with a 1/4'' seam.


Trim away 1/8'' inch of the seam allowance. Note: this doesn't have to be exact, we just want to make sure the raw edge doesn't stick out of the seam in the next step.


Turn the Pocket WS out and press. Notice that the edges above the pocket are pressed as well. Sew the right and left Pocket edges again with a 1/4'' seam.


Turn the Pocket RS out and press. Again, press the edges above the pocket as well. Set aside for the Final Assembly step.

Step 2: Make the Handles
Fold each handle piece in half lengthwise RST. Sew along the raw edge with a 1/4'' seam allowance.


Turn RS out by attaching a safety pin to the end and scooching it through the tube in small sections. Scrunch up the fabric, then pull it away from the safety pin to move the safety pin forward and pull the tube RS out. Press with the seam at the edge.


Top stitch down the length of each handle along the outer edges. Set aside for the Final Assembly step.

Step 3: Embellish with Patchwork Sashiko
Please refer to pages 18-39 in my book, "Patchwork Sashiko: Transform Your Scraps" for detailed instruction on how to lay out your patchwork and apply the hand-stitching. This project utilizes the same method that is used in my "Main Event Embellished Top" project on pages 102-105 in the book. The tote bag will act as the base to your Patchwork Sashiko Embellishment instead of a piece of clothing.
Fold the body piece in half lengthwise WST and finger press the fold. Open the body flat again and draw a line on the fold.
Draw a line 1'' from the right and left sides of the front of the body. Then, draw a line 2'' down from the top of the body. These lines are the boundaries of what will be visible on the front of the tote bag.
Make sure you are working on just one layer, just the front of the tote bag so you don't pin and stitch through the front AND the back.

I designed my Patchwork Sashiko embellishment as if it used to be a rectangle shape and I skewed it to one side by pulling the pieces like taffy (?). It appears as if maybe you would see the rest of it on the back of the tote bag (gee, maybe I should've done that!). Or you could create a balanced look with a little bit in the top left and little at the bottom right. The design is up to you, but I would leave plenty of negative space because this is supposed to be an easy project! Oh, and try some different color threads! I used both white and black in this project and I love it.

Step 4: Final Assembly
Fold and press the 2 top edges of the Tote Bag to the WS by 1'' twice.


Place the top of the back of the Tote Bag (side opposite the embellished front) in front of you with WS up. Lift the fold up and mark center.


Fold the Pocket in half and align with the mark just made. Top raw edge of the Pocket is against the fold. Lower fold back down and pin Pocket in place.


Insert the ends of the handles into the fold on both sides of the pocket. Fold the handles up and pin in place.


Place the top edge of the front of the Tote Bag in front of you with WS up.
Mark 3 1/2'' from left and right edges.


Insert the ends of the 2nd handle into the fold so that the inner edge of the handle aligns with the marks. Fold the handles up and pin in place.


Top stitch the 2 tops of the Tote Bag at the top and bottom folded edge.

Fold Tote Bag in half RS out and align top edges. Pin along one raw edge and sew with 1/4'' seam.


Trim 1/8'' from the seam allowance. (Doesn't have to be exact, we just want to make sure the raw edge doesn't peek out from the seam in the next step.)

Repeat these sewing and trimming steps for the other side. Turn Tote Bag WS out and press the edges you just sewed. Sew both edges again with 1/4'' seam. Turn Tote Bag RS out and press.


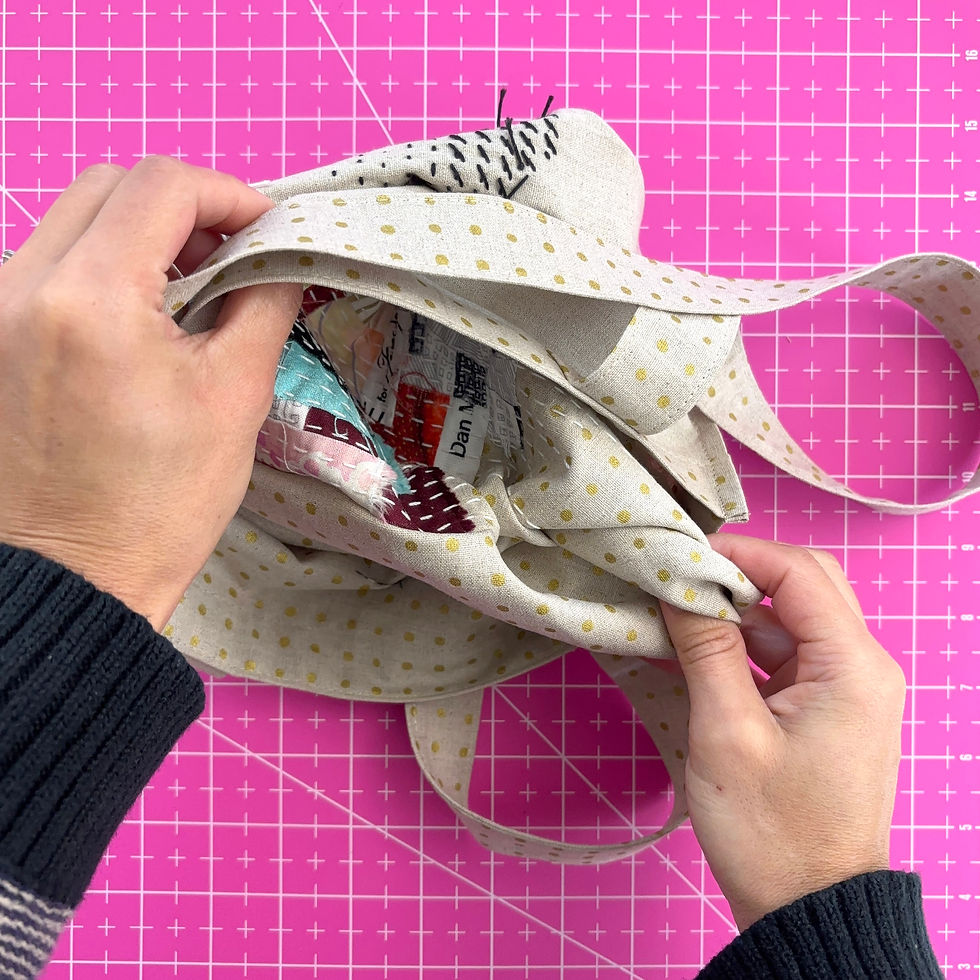

Share your Patchwork Sashiko Tote Bag with Friends and Family
This simple tote bag design makes it easy to spend more time giving and less time making! And hey, I won't complain if you decide to make a few without the embellishment. Just promise you'll use your most fabulous canvas that you've been saving for the right moment. 😉
✨Customize your Tote Bag✨
The first step to changing the size is deciding the size you want! One option is to take measurements from a tote bag you already own. Just remember the tote bag in this tutorial doesn't have boxed corners. Or, a rotary cutting mat is a nice way to visualize the new size. Adjust the borders with some scrap paper, rulers, or pretty much anything straight and long. This tote bag also doesn't have any additional interfacing so the shape is not very rigid. Keep that in mind because bag that's much wider than it is long will be quite floppy.
You can also change the size of the inner pocket, but keep in mind that changing the width of the pocket will cause overlap with the handles. The handles can most likely stay the same length and width regardless of changes in the body size. Although a larger bag may benefit from increasing the handle width.
Take your new desired finished sizes (width x length) and make the following updates to the measurements:
For the body:
Width: add 2''
Length: double and add 4''
For the pocket:
Width: add 1''
Length: double and add 2''
For the handles:
Width: double and add 1/2''
Example: If my finished size is 12'' x 16'', I will cut a body piece that is 14'' x 20''. If I want the pocket to be 6'' x 6'', I will cut a pocket piece that is 7'' x 14''.
Then, follow the directions above in the tutorial. Your handles may need to be positioned differently than what is written in the tutorial. Here's how I normally decide placement of the handles. I pin front and back of the tote bag together so it looks finished. Then, I pin one of the handles onto the bag, ends equidistant from the right and left edges. I put it over my shoulder and carry it hanging down to see the handles feel right. If not, I adjust.
Don't forget to share your makes on social media!
I would love to see and share them.
Use the hashtag #patchworksashikotote and tag me @banjoflannel
Thank you for reading this post. For all the Banjoflannel news scroll down and subscribe to the Knot-Rollers Newsletter!
