Patchwork Sashiko Kit to Project Series: Part II
- Banjoflannel

- May 1, 2020
- 2 min read
Updated: 4 days ago
Part II: Sashiko Stitch and Interfacing

This blog post is Part II in my "Kit to Project" Series. Please read my previous blog post where we start with the steps of creating and securing the patchwork if you haven't already! In this post we'll take the patchwork which we've secured with machine basting and apply our straight sashiko stitching. Then, we'll give it a wash and apply a lightweight interfacing to the back.
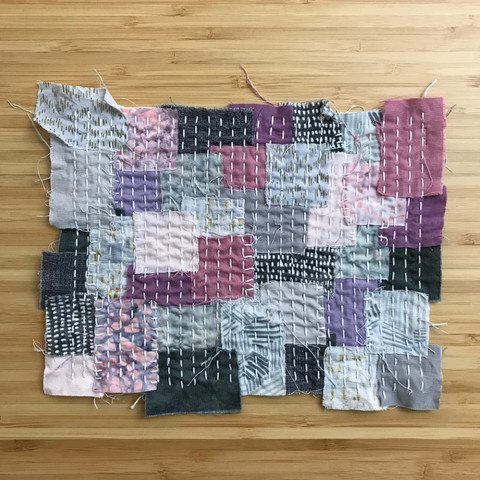
I'll be providing general steps here but all the details can be found in my Patchwork Sashiko Kits or the Patchwork Sashiko Instruction Manual PDF download available in my Etsy store. The kit featured here is "Lavender Twilight". Let's get started!
Sashiko Stitching
1. I prefer my stitches to be as straight and uniform as possible. For this reason I use a ruler to draw lines before stitching. Each of my lines are about 1/4" apart from each other. Draw your first line with a water soluble pen or pencil at one end of the piece. This will be your first sashiko stitch line.
2. Thread your needle and knot the end. With your piece laying flat on the surface in front of you begin stitching from one side following your drawn line. Load the needle with folds (the amount will depend on how thick your patchwork is) and then pull the fabric away from the needle. You have your first stitches!
3. Continue this process of drawing the next line and stitching until you've covered the entire piece.
Watch the video below to see me stitch the patchwork!


Remove the Basting & Wash
4. Remove the basting with a seam ripper.
5. Gently wash the piece and let air dry flat or hang to dry.
6. Once dry, check your piece for edges of patchwork pieces that are not secure. Secure these edges with a whipstitch. (This step is completely subjective. In the very least, I suggest additional stitching for any edges where muslin is exposed underneath.)


7. Cut a piece of lightweight one-sided fusible interfacing on top of the back of your piece. Press with an iron with overlapping to secure all the stitching.
8. And now the moment you've been waiting for...trim the edges if you desire before we move on to the next step. Voila! Admire your work! Hold it up to the sunlight, drape it over things...😊
That's it for now! In the next post we'll finish the series by taking the finished textile and using it for a super cute & super simple project. Stay tuned!
Want to get your own kit and follow along? Find all my Patchwork Sashiko Kits and downloadable Instruction Manual in my Etsy Shop.
